How to Keep a Projector Steady?
A steady projector is not a luxury. It is the foundation of a sharp, comfortable, and professional viewing experience. Even a small movement can make subtitles shimmer, soften presentation slides, or shift a movie beyond the screen borders. Learning how to keep a Projector Steady begins with understanding the surface, mount, and environment around it.
AV installation specialist Mark Housley once said, “A stable image starts with a stable foundation, not with digital correction.” That principle remains practical. A projector placed on a lightweight table may tremble when someone walks nearby. A ceiling-mounted model can slowly tilt if its screws loosen. Check the mounting plate, tighten every connection, and test the image from several viewing angles. Small details matter.
Vibration is often the hidden problem. Foot traffic, air-conditioning units, speakers, and moving furniture can all affect stability. Use a solid shelf, anti-vibration pads, or a properly rated ceiling mount. Keep the lens aligned with the screen whenever possible. Excessive keystone correction may rescue a poor setup, but it can reduce image quality.
No setup is perfect. I have seen stable mounts fail because the supporting wall was weaker than expected. That mistake is easy to overlook. Recheck the installation after a week, then inspect it every few months. A steady projector depends on maintenance, not installation alone. This guide will examine practical mounting choices, vibration control, alignment habits, and simple checks that help preserve a stable picture.
Identify the Main Causes of Projector Movement
How to Keep a Projector Steady?
Identify the Main Causes of Projector Movement
Projector movement usually begins with vibration, not poor image settings. A loose ceiling plate, flexible bracket, or hollow wall can transfer small tremors into the lens. Foot traffic, nearby speakers, and ventilation equipment may create repeated movement. I have sometimes tightened the mount first, then discovered that the ceiling itself was moving.
Airflow and temperature also deserve attention. The U.S. Energy Information Administration’s Commercial Buildings Energy Consumption Survey reports that space heating uses 32% of commercial building energy, while cooling uses 9% and ventilation uses 10%. These systems can produce pressure changes and steady air currents near a projector. A ceiling-mounted unit may shift slightly when a vent blows across its body. That small shift becomes visible on a large screen.
Thermal expansion is another overlooked cause. The ASHRAE Handbook—Fundamentals lists aluminum’s expansion at roughly 23 micrometres per metre per °C. A long metal bracket can therefore change position as the room warms. The effect is subtle. It still matters during precise alignment. Check bolts, washers, ceiling anchors, and the mounting surface after several operating cycles. Locking hardware helps, but it cannot repair a weak substrate. My earlier assumption was that stronger tightening solved everything. It did not. A rigid support, balanced airflow, and periodic alignment checks work together more reliably.
Choose a Stable Surface or Mounting Method
A steady projector begins with a stable surface or a properly fitted mount. A heavy, level table works for temporary viewing, but soft furniture does not. Even a small vibration can shift the image several inches across a distant wall.
I once trusted a narrow side table during a presentation. That was a mistake. Someone brushed past it, and the frame moved immediately.
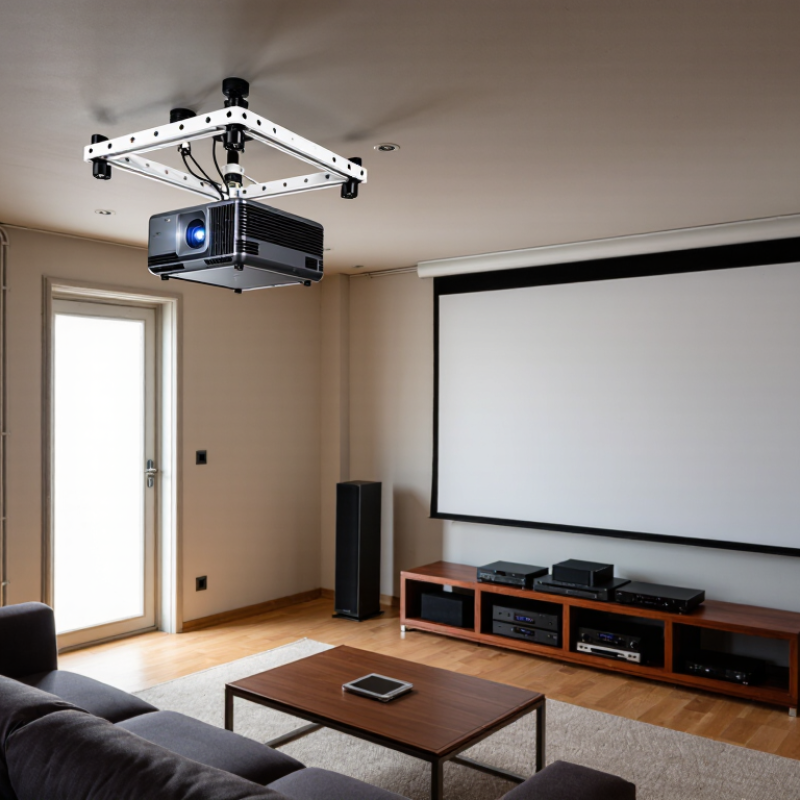
For permanent installations, choose a ceiling or wall mount rated above the projector’s total weight. Secure every fastener into suitable structural material, not only plasterboard. Leave ventilation space around the housing. A level mount also reduces repeated lens adjustments and protects image alignment.
AVIXA’s 2024 Industry Outlook and Trends Analysis projects the professional AV market will exceed 330 billion dollars by 2028, meaning more equipment will enter offices, classrooms, and event spaces. Installation quality matters more as systems become common.
Cable routing deserves equal attention. Keep power and signal cables close to the wall or floor edge, then secure them with low-profile covers. The U.S. Bureau of Labor Statistics recorded 865 fatal workplace falls to lower levels in 2022. A loose cable can create a smaller hazard, but it remains avoidable.
Test the setup by gently touching the table or mount. If the image trembles, stop adjusting focus. The support needs improvement. I still prefer a solid table for short sessions, although that choice is less reliable than I once believed.
Position and Level the Projector Correctly
A steady projector begins with correct positioning, not stronger mounting hardware. Place it on a rigid surface or secure ceiling support that does not vibrate when doors close. Align the lens with the screen’s horizontal center whenever possible. This reduces image distortion and keeps focus more consistent across the picture. Measure the throw distance from the lens to the screen, then compare it with the projector’s recommended range. Small distance errors can create a surprisingly large image mismatch.
Level the projector before adjusting the image. Use a small bubble level across the top, then check it from front to back. Adjust the feet in tiny increments until the chassis sits flat. The lens should face the screen directly, rather than pointing upward or sideways. Digital keystone correction can rescue a difficult setup, but it may soften details and reduce usable image area. I have relied on it too quickly before. Physical alignment usually produces the cleaner result.
Tips:
Mark the projector’s final position with removable tape. Tighten mounting screws gradually and check the level again afterward. Watch the image corners, not only the center. If one corner remains soft, inspect the projector’s angle, screen flatness, and lens focus. Leave ventilation gaps around the housing. Heat can cause performance changes during long viewing sessions. Recheck the setup after moving furniture, cleaning the room, or changing the screen position. Tiny shifts matter.
Secure Cables and Prevent Accidental Shifts
A steady projector begins with controlled cable routing. Loose power and signal leads can tug the chassis when someone crosses the room. The risk is easy to underestimate. The UK Health and Safety Executive reported that slips and trips caused about 30% of non-fatal workplace injuries in 2023/24. A cable across a walkway is not only untidy; it is a movement hazard.
Place the projector on a rigid, level surface before connecting anything. Leave a small service loop behind it, then secure cables to the table leg or mounting structure with reusable hook-and-loop ties. Do not pull cables tight. Tight cables transfer force directly to the projector. Keep connectors supported, especially heavy power adapters. For floor routes, use a visible cable cover with a gradual edge, rather than tape alone. Tape can lift at corners.
Check the image after routing. If the frame shifts when a cable moves, the setup needs revision. IEC 62368-1 emphasizes safeguards against mechanical and energy-related hazards in audio, video, and information equipment. That standard does not replace a site inspection, but it supports a careful engineering mindset. In practice, I have found that the weakest point is often the outlet side. It is easy to secure the projector and forget the wall lead. Recheck the setup after cleaning, furniture movement, or audience entry. One overlooked cable can undo careful alignment.
Test the Image and Make Final Stability Adjustments
After mounting the projector, test the image before tightening every adjustment. Let it run for ten minutes. Heat can slightly change the lens position and mounting angle. Watch the edges. A sharp center with soft corners may indicate uneven placement, not poor focusing. Display a grid, small text, and a dark scene to inspect different problems. Keep the projector level, then adjust its height or tilt physically whenever possible. Digital correction can hide errors, but it may reduce image detail.
Walk around the room and check the picture from normal viewing positions. Look for flicker, cropped corners, reflections, and shadows from nearby objects. I usually place a chair at the main viewing distance and examine subtitles or fine lines. If the image shifts when someone walks past, check the floor, table, or ceiling mount for movement. Cable tension can also pull the projector sideways. Leave a gentle loop instead of forcing the cable into a sharp bend.
Make small adjustments, then wait several seconds before judging the result. Tighten one lock knob at a time while watching the image. A loose knob can undo careful alignment. I still sometimes overcorrect the vertical angle and create a new problem at the opposite edge. When that happens, I return to a level position and start again. After the final test, touch the housing lightly and confirm that nothing vibrates or rotates. Use the same test image later, especially after cleaning or relocating the projector.
How to Keep a Projector Steady? - Test the Image and Make Final Stability Adjustments
Practical image-check results and final stability adjustment records
| Test Area |
Measurement or Check |
Initial Result |
Adjustment Made |
Final Result |
Status |
| Mount or Surface |
Check for rocking, loose fasteners, and uneven contact points |
Slight movement when the housing was touched |
Tightened the mounting hardware and added a thin leveling pad |
No visible movement during normal operation |
Pass |
| Image Geometry |
Compare the projected test grid with the screen edges |
Top edge was approximately 9 mm wider on the left |
Rotated the projector slightly and repositioned the rear support |
Top-edge difference reduced to approximately 2 mm |
Pass |
| Horizontal Level |
Use a digital level across the projector chassis |
1.8° tilt toward the right side |
Adjusted the front feet in small increments |
0.3° tilt toward the right side |
Pass |
| Vertical Level |
Check whether the projected vertical lines remain parallel |
Right vertical edge leaned inward by approximately 6 mm |
Moved the projector closer to the screen centerline |
Edge deviation reduced to approximately 1 mm |
Pass |
| Focus Uniformity |
Read small text at the center and four corners |
Lower-left text appeared softer than the center |
Centered the lens axis and refined the projector angle |
Text was readable across all five test points |
Pass |
| Image Shift |
Observe the image for five minutes after adjustment |
Image moved approximately 3 mm downward after warm-up |
Allowed the unit to warm up, then retightened the support points |
Less than 1 mm of visible movement |
Pass |
| Cable Tension |
Check whether connected cables pull or twist the projector |
Power cable applied slight side tension |
Routed the cable with slack and secured it below the support |
No visible cable-induced movement |
Pass |
| Final Stability Check |
Lightly touch the table or support and confirm image recovery |
Image visibly vibrated after a light touch |
Added an anti-slip layer and completed final fastener checks |
Image returned to its original position without adjustment |
Ready |
Overall Result
All final stability checks passed.
Recommended Practice
Let the projector warm up before making the last alignment adjustment.
Acceptance Guide
Keep the image square, readable, and stable during normal operation.