Inquiry
Form loading...

How to Choose the Right Observatory Dome Diameter?

Choosing an observatory dome is not simply a matter of matching a telescope to a circular shell. The right Observatory Dome Diameter must support clear sky access, safe movement, equipment growth, and stable operation over many years. A dome that looks generous on a drawing may feel cramped when a mount, counterweights, stairs, cameras, and two people occupy the same space.

Experienced installers usually begin with the telescope’s fully equipped footprint, not the optical tube alone. Measure the mount at every operating angle. Include pier clearance, cable routes, control cabinets, and maintenance access. Then add working space around the instrument. For many private installations, an extra 600 to 1,000 millimeters can make alignment and servicing easier. It is not a universal rule. Local climate, building codes, wind exposure, and observing habits can change the answer.

A professional review should also consider slit width, shutter travel, roof height, and future upgrades. A larger dome can improve circulation, yet it may increase cost, heating demand, structural loads, and rotation requirements. A smaller dome can reduce expenses, but poor clearance may create blind zones or force awkward movements. Measure twice. Still, measurements can mislead when real equipment differs from catalog drawings. Speaking with dome manufacturers, telescope engineers, and experienced observers helps test those assumptions. This guide explains how to evaluate Observatory Dome Diameter through practical dimensions, credible design checks, and honest attention to compromises. The goal is not the biggest dome. It is a dependable observing space that remains useful after installation excitement fades.
How to Choose the Right Observatory Dome Diameter?

Understanding Observatory Dome Diameter and Its Role

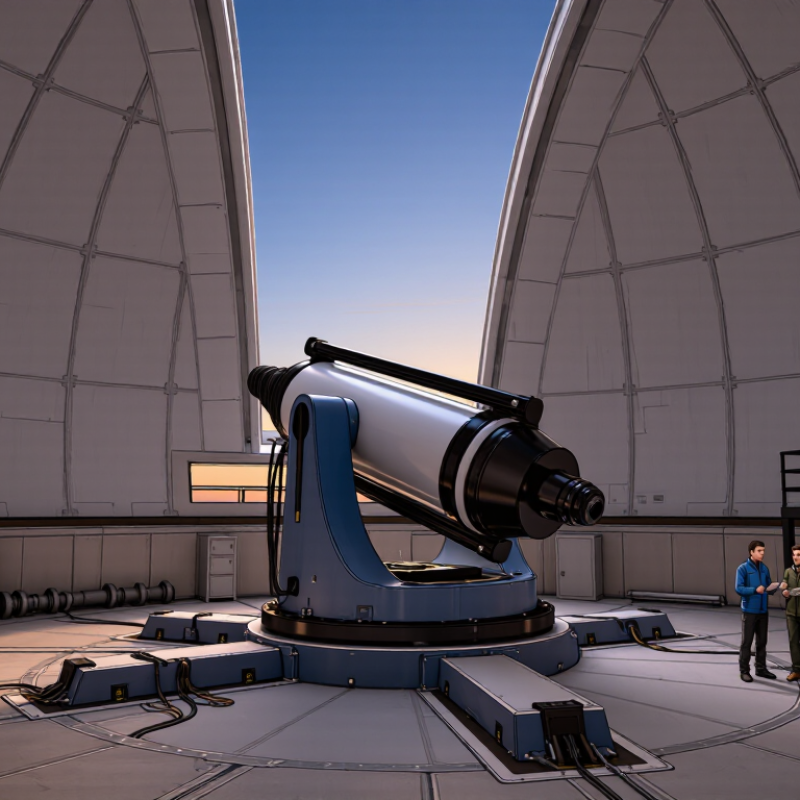
Observatory dome diameter is not simply a larger version of telescope aperture. It defines the working space around the instrument, pier, mount, and observer. A small dome may fit the telescope on paper. It can still restrict low-altitude targets, cable movement, or maintenance access. Measure the telescope’s complete swept envelope, including counterweights and camera equipment. Then add clearance for safe movement and future adjustments. Real drawings matter more than catalog dimensions.

Diameter also affects the dome’s internal climate. A cramped enclosure warms quickly during the day and may produce turbulent air after opening. That poor seeing can soften stars, even with excellent optics. A larger volume helps, but insulation, ventilation, and local weather remain important. Wind exposure rises with size, too. Structural calculations should address rotation loads, snow, rain, and the observatory’s foundation. An experienced engineer should verify these conditions for the site.

In practical design reviews, I compare three layouts: the current telescope, a realistic upgrade, and a maintenance position. Mark the pier center, wall clearance, shutter opening, and walking path on the floor. Then test the longest viewing angles. It is easy to overestimate future equipment. It is also easy to underestimate a technician’s reach. Design reviews have shown a seemingly generous diameter can fail because a ladder cannot turn beside the mount. Leave useful space, not empty space. Check every obstruction before construction.
Matching Dome Diameter to Telescope Size and Mount Movement

How to Choose the Right Observatory Dome Diameter?

Choosing a dome diameter begins with the telescope’s complete movement envelope, not its mirror size. A long optical tube can require more room than a larger, compact instrument. Measure the telescope, focuser, cameras, counterweights, and cables. Include the mount’s pier clearance.

The mount must move freely at every position. Check the meridian, horizon, and zenith. At zenith, counterweights may swing close to the dome wall. During tracking, the telescope may also approach the slit edges unexpectedly. A useful design method is to create a full-scale movement diagram or digital model. Add practical clearance around the widest position. Ten centimeters may look sufficient on paper, but installation tolerances can quickly consume it.

Think beyond static measurements. The dome slit must follow the telescope without clipping its field of view. The lower wall should not block low-altitude targets. Leave room for maintenance access, ventilation, and safe movement around the pier. A larger dome can improve usability, yet it may increase cost, wind exposure, and rotation demands.

A neat estimate can still be wrong. Recheck every axis. Small accessories often become the final obstruction. When possible, test the mount with temporary framing before ordering the dome. That simple step can reveal awkward angles that calculations miss.

Calculating Clearance for Equipment, Observers, and Maintenance

How to Choose the Right Observatory Dome Diameter?

Calculating Clearance for Equipment, Observers, and Maintenance

Dome diameter should begin with the equipment’s full movement envelope, not its mirror size. Measure the telescope, mount, cameras, cables, and counterweights at their widest positions. Include the lowest and highest pointing angles. A small gap can become a serious obstruction during tracking.

In practice, I calculate the required radius from three distances: equipment reach, observer space, and maintenance access. Allow at least 600 millimeters around areas where people stand or work. Add space for ladders, tool cases, and temporary equipment. Then multiply the largest combined radius by two for the minimum internal diameter. A 10 to 15 percent allowance helps accommodate future upgrades and measurement errors.

Do not forget the dome slit and wall height. The opening must clear the telescope at every operating angle, while the walls should not block low-altitude observations. Check the entrance path too. A large instrument may fit inside but fail to pass through the door. I have seen plans that looked correct on paper, yet ignored cable bends and a technician’s shoulder space. That mistake is easy to repeat. Draw the equipment in its most awkward position, then test access with a person standing beside it. Clearance is not empty space; it is working space.

Evaluating Site Conditions, Viewing Angles, and Future Expansion

Choosing the right observatory dome diameter starts with the site, not the telescope. On a hillside, wind exposure may require stronger construction and extra clearance. Near tall trees, the visible sky can be narrower than a survey suggests. I inspect the horizon from the proposed pier location at different times of day. This reveals rooflines, branches, glare, and seasonal obstructions. Measure twice. A small mistake here can limit an expensive instrument later.

Viewing angles deserve equal attention. The dome opening should match the telescope’s practical altitude range, not only its maximum specification. Low targets may disappear behind the wall, while high targets can approach the slit edge during tracking. I check clearance toward every compass direction. I also allow space for cables, safe movement, ventilation, and maintenance access. A slightly larger diameter often improves usability, but excessive size increases wind load, cost, and rotation demands.

Future expansion changes the calculation again. Leave room for a wider optical tube, a second mounting position, or updated equipment. Service paths should remain usable when the room contains cases and tools. My first layout was too optimistic; equipment occupied more floor area than the drawing showed. A scaled cardboard mock-up can expose this problem early. Keep expansion realistic. Extra space has value only when the site, foundation, and budget can support it.

How to Choose the Right Observatory Dome Diameter? - Evaluating Site Conditions, Viewing Angles, and Future Expansion
Planning Dimension Small Dome
(3.0 m clear diameter)
Medium Dome
(4.0 m clear diameter)
Large Dome
(5.0–6.0 m clear diameter)
Design Implication
Typical telescope aperture Approximately 150–250 mm Approximately 250–400 mm Approximately 400–600 mm These are planning ranges only. The required dome size depends on the complete instrument envelope, mount type, accessories, and maintenance clearance.
Recommended internal clearance around the instrument Measure from the widest moving part of the telescope and mount, not from the optical tube alone. Clearance should allow safe movement, inspection, and emergency access.
Suitable mounting arrangement Compact alt-azimuth or small equatorial mount Equatorial mount with moderate counterweight and accessory space Large equatorial or alt-azimuth system with substantial counterweight and service area A pier-mounted telescope generally requires less floor area than a tripod, but the pier location must be coordinated with the dome rotation axis and shutter opening.
Usable viewing direction Best for sites with a clear local horizon and limited equipment Good balance between horizon access, zenith access, and operator space Best where wide sky access, multiple instruments, or future equipment is expected The dome should not be sized only for zenith viewing. Check the lowest intended altitude angle and all nearby obstructions, including the building parapet and terrain.
Recommended shutter opening Typically sized to clear the telescope and target sky sector Typically wider than the maximum optical-tube width with movement margin Wide opening preferred for large instruments, low-altitude targets, and multiple observing positions The opening must provide adequate clearance at the lowest planned observing altitude. Verify the telescope’s full swept path through computer-aided or physical clearance checks.
Low-altitude observing requirement More sensitive to horizon walls and shutter geometry Improved clearance when the dome wall and shutter are properly proportioned More forgiving, but still affected by the local horizon and dome profile Atmospheric extinction and turbulence increase near the horizon. Many observatories limit routine observations to objects above approximately 20°–30° altitude, depending on scientific goals and site quality.
Wind exposure More vulnerable to vibration if the dome is light or poorly anchored Requires careful structural design and a rigid telescope pier Greater wind area and torque require stronger structure, anchorage, and rotation components Use the governing local building code for wind speed, exposure category, importance factor, and cladding pressure. Operational wind limits for the telescope are separate from structural design loads.
Snow and ice conditions Lower roof area, but the shutter and rotating track still require protection Moderate roof and track maintenance requirements Higher snow accumulation, drift, and ice-management demands Structural snow load must be calculated from the local code and site elevation. Provide drainage, sealing, heating or de-icing provisions where required by climate.
Thermal behavior Can reach outdoor temperature relatively quickly Moderate thermal mass and ventilation requirement Greater internal air volume can delay thermal equalization Ventilation should reduce the temperature difference between the dome interior and outside air before observing. Avoid heat sources near the telescope and optical path.
Floor and operator space Limited room for seating, controls, and storage Usually accommodates one operator, controls, and essential accessories Allows more comfortable circulation, storage, and additional equipment Keep the telescope pier structurally isolated from the surrounding floor where possible to reduce vibration caused by walking or equipment movement.
Future expansion allowance Limited; best for a fixed equipment plan Moderate; may accommodate larger accessories or a modest instrument upgrade Allow space for future cable routes, control cabinets, maintenance access, and the largest anticipated instrument—not only the current telescope.
Recommended use case Visual observing, educational use, and compact imaging systems General-purpose imaging, research support, and advanced amateur installations Research-oriented systems, large imaging platforms, multiple instruments, and long-term expansion Choose the smallest dome that satisfies the complete operational envelope, not merely the telescope aperture.
Planning note: Clear diameter refers to the usable internal diameter of the dome. Confirm final dimensions using the telescope manufacturer’s complete motion envelope, mount and pier drawings, shutter geometry, local wind and snow-load requirements, accessibility regulations, drainage requirements, and a site-specific horizon survey. A practical design should also reserve approximately 15%–25% additional space beyond the current equipment envelope when future expansion is expected.

Comparing Dome Designs, Costs, and Installation Requirements

Choosing the right observatory dome diameter requires more than measuring the telescope. In site assessments, I consider instrument length, mount movement, service space, and future upgrades. A six-meter dome may suit one telescope, but feel cramped after adding cameras, storage, or a second instrument. Room matters.

Rotating domes with narrow slit openings offer strong weather protection and precise tracking. Their motors, control systems, and curved structures usually increase purchase and maintenance costs. A simple roll-off roof can cost less and provide a wider sky view, but it needs clear rails, drainage, and greater exposure to wind. A fixed shelter is cheaper, yet it may restrict observing angles. Prices vary widely, but installation often adds 20 to 40 percent to the structure cost.

Site preparation can become the hidden expense. Concrete must support vibration-sensitive equipment, while electrical conduits and network cables should be planned before pouring. Delivery access also matters; a large dome may require lifting equipment or partial assembly on site. My early estimates were too optimistic when transport and weather delays were included. Check local wind, snow, and planning requirements with a qualified engineer. Leave practical clearance around the telescope, not just the minimum opening diameter. Oversizing helps, but unnecessary volume raises heating, structural, and installation costs.